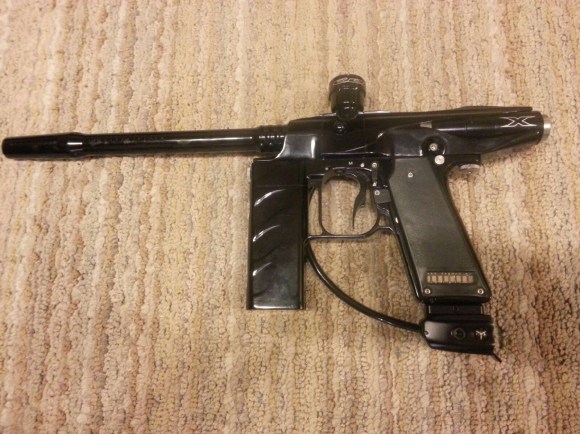
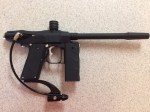
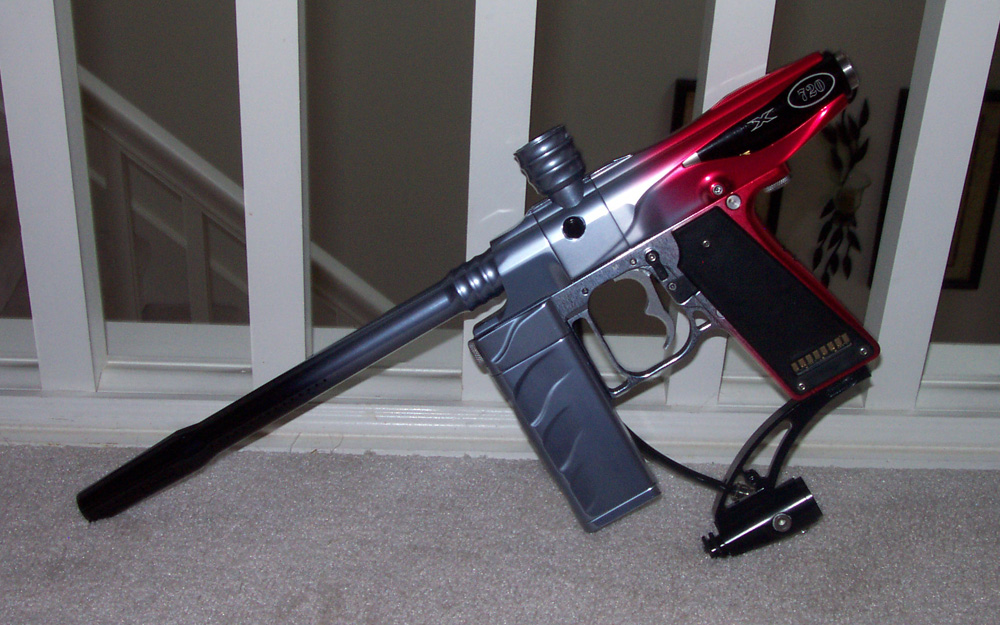
The Emag and Xmag are the top of the food chain in the world of Airgun Designs. These badboys boast fully adjustable magnetic triggers, a fail-safe mechanical over-ride, ultra-low profiles, the proven anti-chop system the level 10, and the fastest recharging valve in the world.
The Emag and Xmag constitute the entire AGD electrical marker line and have few differences between them. In this section I will give you all the information you could need for both markers. I’m not going to get into the operation of the entire valve. However I will do my best to cover everything I can think of in the debugging section. If you have any other questions, contact me.____________________________________________________________________________
1. About the Emag and Xmag Valve
2. General Differences
3. Adjusting the Trigger
4. Charging the Battery
5. Adjusting the A.C.E. (Xmag)
6. Board Firmware Versions
7. Nubbins and Ball Detents
8. Powerfeed Plugs
9. Marker Maintainence
10. What Not to Do
11. Debugging
12. Aftermarket Parts
13. Upgrades
____________________________________________________________________________
1. About the Emag and Xmag Valve
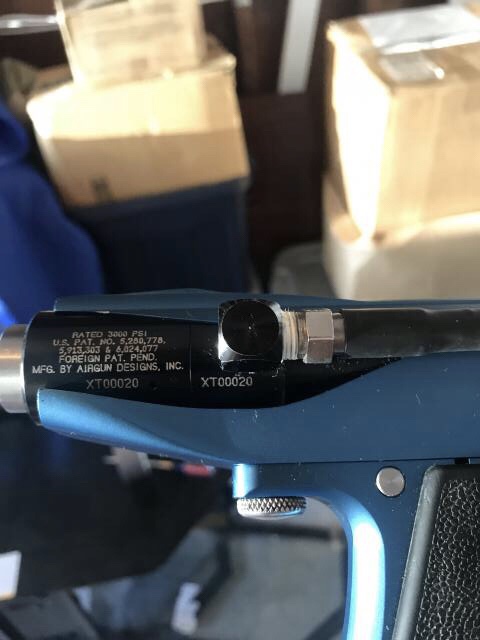
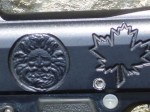
The Emag/Xmag valve is identical to the RT/RTP/X valve(see About the RT/RTP Valve) with a different logo engraved on the outside. The valve does however require a different on/off pin length(.712″) (Sear tolerance for Emag/Xmag – trigger rod 2.125″, plunger rod 3.008″) and a special o’ring in the on/off assembly called the “Quad o’ring”. The Quad o’ring(pictured below) is seamless in the center and is used to reduce drag on the on/off pin that caused hang-ups with the standard o’ring that has a seam in the center. The drag was caused by the added weight of the sear over the RT/RTP sear.
**The ULE Trigger Pull Kit is NOT recommended for the Emag or Xmag.
 Quad O’ring Quad O’ring

____________________________________________________________________________
2. General Differences
Both the Emag and Xmag have three modes of operation. Mechanical mode(selector switch lever in the 9 o’clock position and the battery off)(operates without the electronics), Electronic mode(selector switch lever in the 6 o’clock position and the battery on)(operates like a normal electric marker with a magnetic switch), and Hybrid mode(selector switch lever in the 9 o’clock position with the battery ON)(trigger is actuated electronically with a mechanical trigger response).
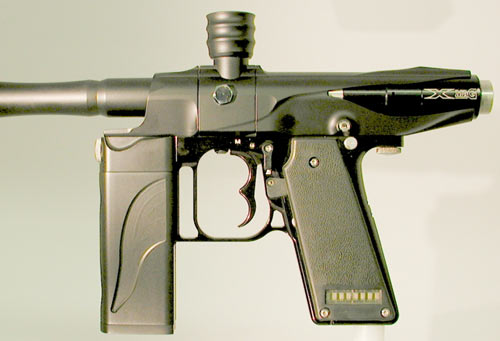
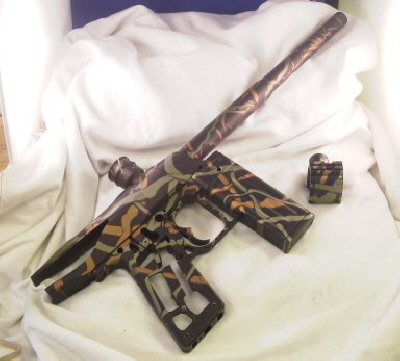
There’s the Emag and ULE Emag. When the Emag first came out, it was heavy(bout 3.4lbs.). Now with all the ULE(ultra light engineering) parts, you can upgrade to, or buy a ULE Emag which performs the same but at almost a full pound lighter (bout 2.5lbs.)
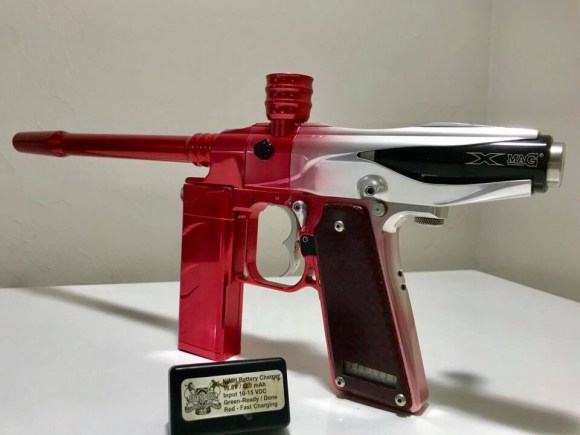
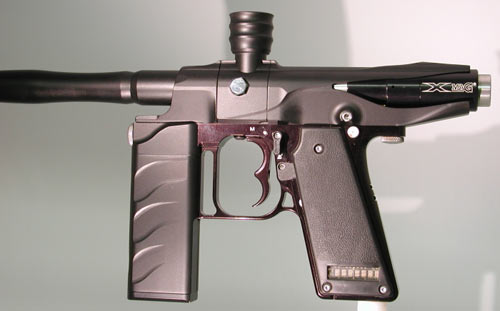
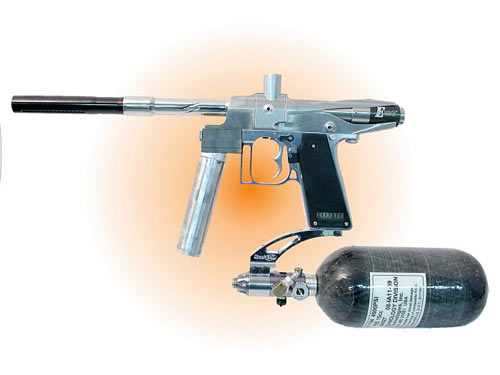
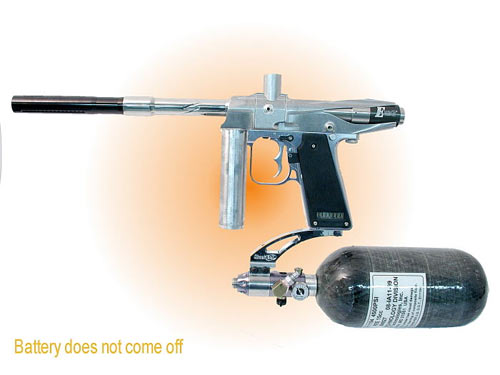
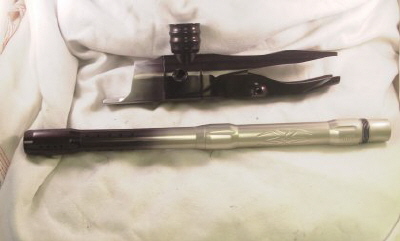
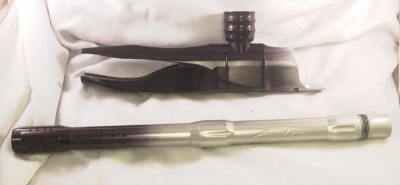
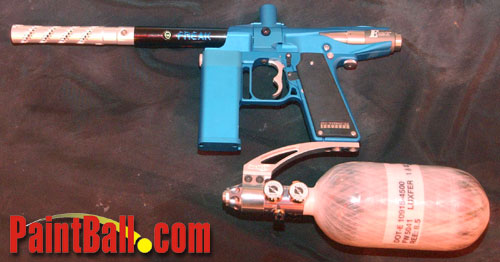
The Xmag(2.7lbs without barrel) is pretty much the same thing as an Emag cept for a few details. The biggest difference lies in the aluminum body with interchangeable breeches(accepts cocker threaded barrels). This takes the place of the standard body and rail for the Emag. The Xmag also has an adjustable A.C.E. with an on/off switch.
____________________________________________________________________________
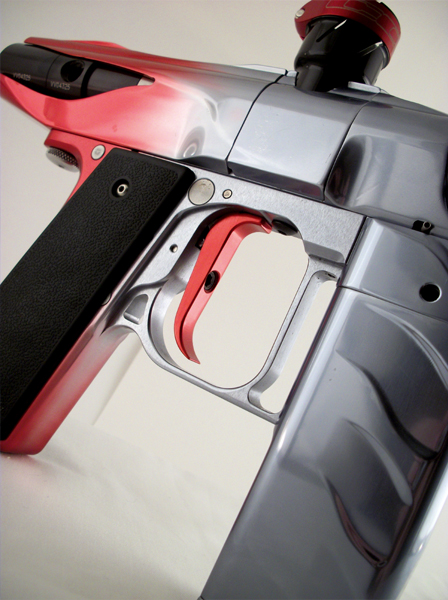
3. Adjusting the Trigger
There are three different ways to adjust the Emag/Xmag trigger, pull weight, pull length, and how soon the pull is recognized. The Emag/Xmag trigger is magnetic so with no mircoswitch, there is almost no limit to how heavy or light you can make your pull. With the three adjustment points together, you can truly get the pull you desire from a marker.
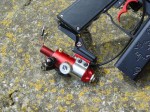
To adjust the trigger, you must first remove the trigger frame and battery from the rest of the marker. After degassing, there is three screws that need to be removed, the valve field strip screw, the front frame screw, and the sear axle pin(on the left side of the rail for Emag / left side of Body for Xmag). you can remove all three screws using a 1/8 allen wrench.

To test your pull, hook up the battery and turn on the frame. Slightly lift the back of the sear with your finger and pull. The pic shows the marker in mechanical mode but to test your trigger for reliability you will need it in electric mode. (Use this method if your firmware does not have a trigger test feature.)

The first step is to get a pull weight that you are happy with. To adjust the weight, remove the magnets from the frame so you can determine your starting point. If you want a heavier pull, simply add more magnets(AGD uses earth magnets) or remove any shims that may be in use. If you want a lighter pull, either remove magnets until there is only one left, and/or use something not metallic(o’ring, paper, etc.) as a shim to increase the distance between the magnet in the frame and the magnet in the top of the trigger. On the Xmag, the magnets are located under the ace board, simply unscrew the board to get in there. (this adjustment is only for electric mode)

The easiest way to remove a magnet from the frame is to put the marker in mechanical mode, pull the trigger back and use an allen wrench to attract the magnet from the frame.

The next step is to adjust the pull length. Make sure the selector switch lever is in the E(6 o’clock) position. Using a 1/16 allen wrench inserted in the top of the selector switch, turn clockwise to shorten pull length and counter-clockwise to increase it. The set screw can be adjusted so the trigger has enough play to hit the selector switch or not move at all. When shortening the trigger pull, constantly test with every adjustment that the pull is still registered. To make sure you have a reliable pull, push the trigger to the right side and pull while pushing to the right. Do the same pushing the trigger to the left side.(this adjustment is only for electric mode)

The last adjustment is the firing point(where in the stroke the trigger is recognized by the H.E.S.) The H.E.S.(Hall Effect Sensor) looks for a magnetic field(the magnet in back of the trigger). In order for the H.E.S. to know when the trigger is being pulled and not being pulled, the trigger magnet must be close enough for the H.E.S. to sense it when the trigger is pulled but also far enough for the H.E.S. to not sense it when the trigger is not being pulled. For a reliable pull, you want the magnet to be sensed anywhere from the middle to just before the end of the stroke. Insert the same 1/16 allen wrench in front of the trigger. Clockwise moves the magnet closer to the H.E.S.. Counter-clockwise moves the magnet further away. Remember to do the push to the side and pull test. (this adjustment effects both electric mode and hybrid mode.)

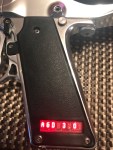
If the trigger pull is not registering properly or the board will not boot up properly
If the trigger magnet is too close to the H.E.S. when the trigger is NOT being pulled, the L.E.D. will either not show anything when you turn off and on the battery, or there will be a bunch of characters that dont make sense.
solution – back the magnet out until the board boots up normally
If the trigger magnet is too far from the H.E.S. when the trigger IS being pulled, you will either not register a trigger pull, or it will only register a pull while pulling the trigger straight back or only to one side. Remember, a reliable pull needs to be registered while pushing the trigger from both sides.
solution – If no pull is being registered or a pull is only registered when pulling the trigger straight back and/or from one side only there may be different ways to solve this. Either the magnet is too far back, the trigger pull has been adjusted to be too short, or a combination of the both. If you want to keep that pull length, try moving the magnet closer to the H.E.S. Remember the board may not boot up properly if the magnet is too close. Also remember to keep the firing point between the middle to just before the end of the stroke. You may have to give a little more play in the pull length to get a reliable pull.
____________________________________________________________________________
4. Charging the Battery
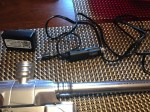
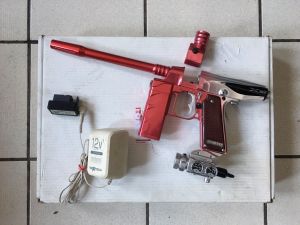
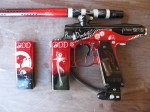
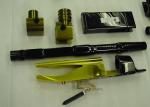
The most valuable information you could have about your charger is not to lose it. It’s a very expensive replacement part($80) due to all the labor it takes to build it properly. This is why it’s also not a good idea to try and build your own charger. When charging the battery in the car, only use the cord supplied by AGD. If you want a wall charger, not just anything will do. Go to Radio Shack and buy thier 12-Volt 1500mA AC-to-DC Power Adapter($19.99)(pictured below). Make sure it has the blue tip with the tip inserted in the proper polarity! Dont charge your battery overnight. When it’s charging, you’ll see a red light. Green is supposed to be charged, but the light actually turns green once the battery has about a 80% charge. You could leave it on for about another 30-60min to let it completely charge. A completely dead battery shouldn’t take longer than 4-6 hours to completely charge. A properly charged battery should read 20-22volts.

____________________________________________________________________________
5. Adjusting the A.C.E. (Xmag)
I personally do not use my ace because my level 10 just works too good. However, if you do want to use it, adjust with a fine flat head screw driver as follows…
clockwise – more sensitive
counter-clockwise – less sensitive
Drop a ball in the breech with the sensitivity down and turn it up until it fires put the safety on so it doesn’t actually shoot, just listen for the solenoid when adjusting.
For two color paint, insert the paintball dark side down into the breech, adjust until the gun fires. Then turn clockwise 2 full turns
ace 1 – one color paint
ace 2 – two color paint

____________________________________________________________________________
6. Board Firmware Versions
If your wondering about the latest firmware out there and the differences between them, read on.
If you have anything pre – 1.37 your Emag severely needs to be flashed. 1.37 was the most common version and was around for a long time. It had a better memory, was capped at 16bps, had a game timer, shot counter, a total shot counter, low battery indicator, along with burst modes(with jumper). No full auto.
When the Xmag first came out 2.1 was released. The main difference was ace support. Everything pretty much remained the same. Burst modes were removed, and with the ace on the board would cap out at 24bps.
2.4 was released very soon after 2.1 which lowered the ace cap down to 20bps and had “ace 1”, “ace 2” for one and two color paint.
3.0 was released with a shot buffer(tells the board how soon it can look for another shot in ms.) also had a trigger test mode. This version had many bugs.
3.2 came right out after 3.0 which fixed the major bugs the new feature of 3.0 had.
4.0 official release to be announced. An even more improved version of 3.2 with added features. Debounce, capped at 26bps, different trigger test modes, solenoid toggle on/off, and a true bps counter.
____________________________________________________________________________
7. Nubbins and Ball Detents
If you own any type of Automag with a stainless steel body, then you use nubbins as your ball detent. They mount on the barrel. The old version is the wire nubbin which did the job but eventually the plastic nubbin was made and released. Since the wire nubbin was around for a very long time, some companies that made aftermarket barrels for the Automag didnt feel the need to pay too close attention to detail. For this reason, on some aftermarket barrel the nubbin groove is slightly different so the new plastic nubbin doesn’t sit properly. By all means upgrade to plastic nubbins but if you notice that you are double loading, or you get radical velocity drop-off, then there is a chance that your nubbin may not be doing its job. In this case switch back to wire and see if the problem goes away.
 Wire Nubbins Wire Nubbins
 Plastic Nubbins Plastic Nubbins
If you own an Xmag or any mag with a ULE body on it, then that means you have switched from nubbins to ball detents. The threading for the AGD detents is the same as the Angel. However, the AGD detents are made with a slightly larger bore around the ball. This gives the ball space to move rather than jamming up when a bolt with a higher boltspeed hits it. Even if you own an Angel, I highly recommend buying AGD detents. They are also insanely cheaper than other detents sold for the Angel and perform much better.
____________________________________________________________________________
8. Powerfeed Plugs
Like barrel nubbins, there are older and newer versions of the powerfeed plug. You can easily check to see if you have an older one by looking for a flat spot instead of a constant “parabolic” curve. That flat spot kills feedrates, get upto speed with the newer parabolic plug.
 *Thanks to RobAGD on AO for the pic. *Thanks to RobAGD on AO for the pic.
____________________________________________________________________________
9. Marker Maintainence
To keep your Emag or Xmag happy, just keep it charged, cleaned, and oiled.
Before every day of play.
1. Make sure your battery is charged.
2. Take the barrel off.
3. Put about 4 drops of oil in the asa or input to the valve.
4. Air up the marker and cycle it at least 40 times.
5. Your done.
At the end of every day.
1. Wipe off excess dirt, paint, etc. from the outside of the marker.
2. Take the valve out and wipe off any dirt, paint, etc. that may have collected around the bolt area.
3. Make sure the inside of your barrel is clean.
4. Repeat the before every day of play steps(omit step one).
5. Your done.
Depending how often you play and how down n dirty you get, every now and then you should fully strip your marker down to clean collected dirt, paint, etc from anywhere it may have collected(then oil it). When taking out the Reg. Piston and Spring pack, regrease them using any quality grease, the grease is there to prevent rusting, not to lubricate.
It’s very important to keep dirt and foreign debris out of the valve and air system. Some easy and effective steps are to use a good fill nipple cover and a thread saver cover if you use a screw in tank.
It’s always a good idea to have a little kit handy with extra o’rings and other parts that may wear or ruin, or parts that may be easy to lose like the field strip screw or a battery saver plug.
____________________________________________________________________________
10. What Not to Do
The Basics
1. Dont loosen the field strip screw or the front frame screw while the marker is gassed up.
2. When you take apart the marker and reassemble it, make sure it has the Rail Bushing(pictured below). It goes in the rail and back of the trigger frame.
 Rail Bushing Rail Bushing
3. Don not try and run the Emag or Xmag with Co2.
4. When taking the valve out. After you have degassed, pull the trigger to release trapped air if you have the level 10(see level 10). After taking the field strip screw out, before forcing the valve out – turn off the safety, turn on the battery(or flip it to manual) and pull the trigger.
5. Do not overtighten the field strip screw, slightly past hand tight with an allen wrench is fine.
6. Never modify the valve or rail in any way so that the Z-lock pin does not glide thru the rail track.
7. Never overcharge the battery or allow anything that can carry an electrical current to directly connect the terminals of the battery.
8. Never loosen or remove the PC board, this is for advanced users ONLY.
9. Do not allow moisture or liquid to come in direct contact with the electrical components of the marker or charger.
For Dummies
There are people out there who think they can achieve better performance by modifying parts. They are wrong. If the existing marker could reach a better performance as it is, it would come that way out of the factory.
10. DO NOT shave the sear, adjust the trigger rod, or the plunger rod length.
11. DO NOT modify the on/off pin length, you will end up with a marker that either wont work or wont be allowed anywhere. This also voids your warranty.
____________________________________________________________________________
11. Debugging
In this section I will cover every possible problem I can think of or that I have encountered. I will continue to add to it as I remember and/or come across new bugs.
If your marker has any type of problem with it, the first thing you should do is check that your battery is charged, tank is full, look over all the o’rings, make sure every o’ring and part is installed in the proper order, make sure everything is clean and oiled.
Since we’re dealing with an electric marker that can shoot in mechanical mode, the first thing to do is check or make it work in mechanical mode to help isolate the problem down to the mechanical or electrical portions of the marker. If the marker works flawlessly in mechanical mode, then skip down to the Electrical aspects.
Mechanical Aspects
Major and Minor Air Leaks –
When determining how to stop a leak, you must first find out where it’s coming from. This will help isolate what’s wrong.
1. A leak out of the velocity adjuster hole –
There’s a number of things that could do this. The most common is a bad reg piston or you are over pressurizing the reg so it relieves pressure to keep the valve from shooting hot(try turning down the velocity or making sure the air tank isn’t pumping out an extremely high amount of pressure). Other possible problems are a bad reg piston o’ring(check it and grease it), or too low of a velocity setting(try turning up the velocity). You will also get a leak if you do not pressurize the valve fast enough or there isn’t enough pressure to seal the valve itself.
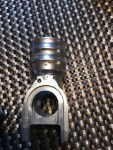
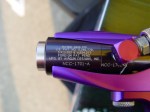
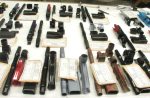
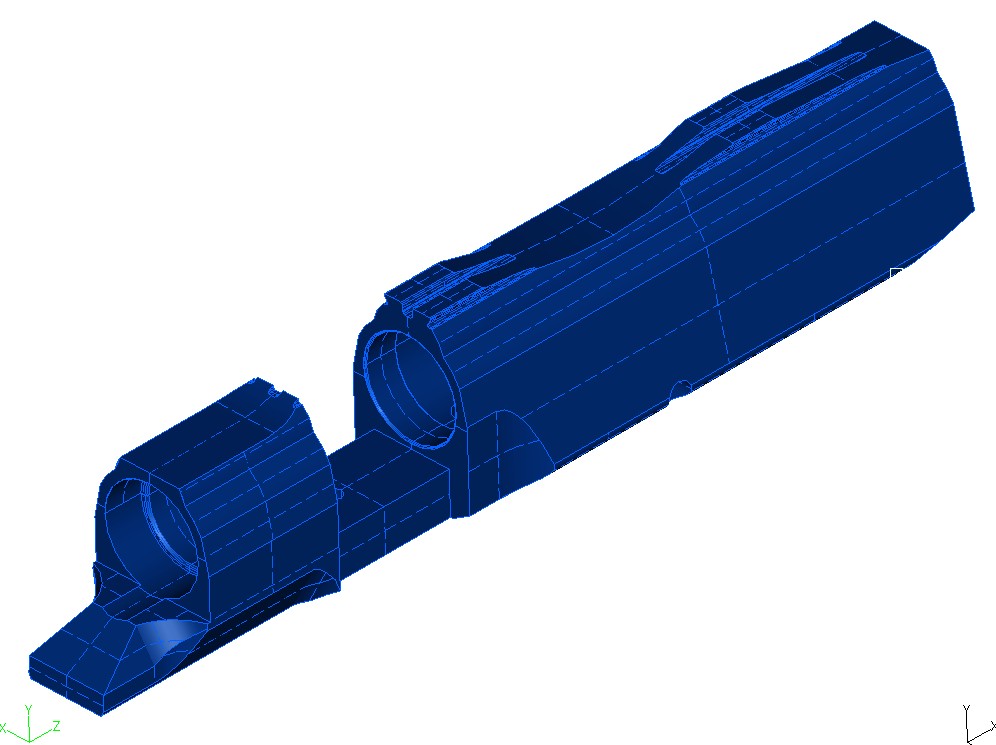
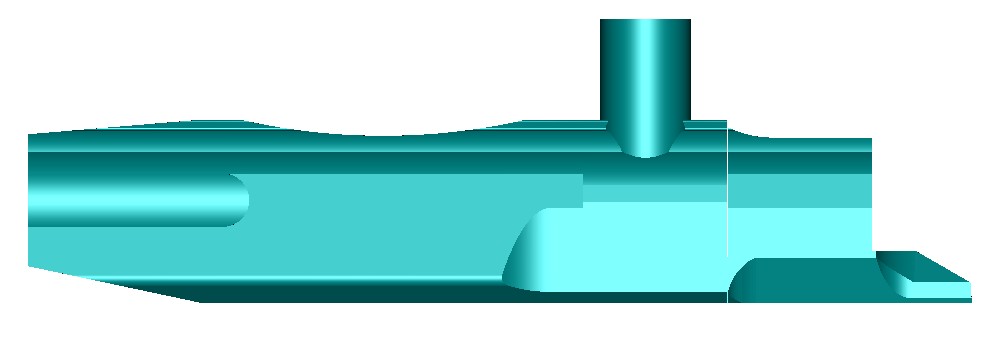
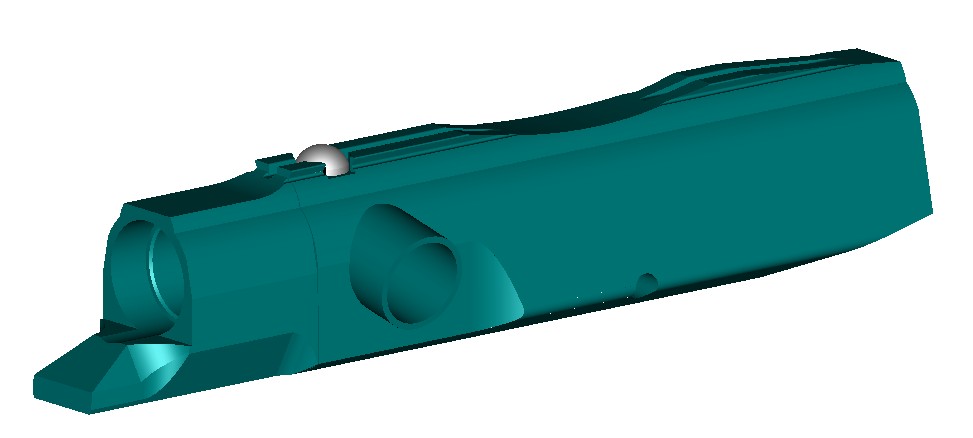
2. A leak out of the side hole of the valve assembly(pictured below) –
This is a safety blow off feature made to keep the Retro quick recharge from becoming the supersonic ball slinger(no it wouldn’t be that bad).(Replace your reg. valve pin)

3. A leak from the On/Off area –
First make sure everything’s installed properly. Check that your on/off pin(.712″) is not bent or broken. You may have to clean or replace the o’ring that’s inside the on/off assembly, it unscrews into two pieces. If none of this helps, look to see that your trigger(2.125″) rod and plunger(3.008″) rod length are ok and that the trigger rod is pointing where it should be.
4. A leak from the front end of the valve or the bolt/breech area –
This could also be a number of things. Whether your running a level 7 or 10 set-up, I recommend checking those sections first.(also check the on/off pin(.712″) If after you have checked those areas and know everything is installed properly, continue reading. A bad bolt spring(broken or not extending past the bolt, also remember cut side goes on bolt end), sear, trigger(2.125″)/plunger(3.008″) rod length can give you a massive leak down the front. There’s also a two rare problems that can be wrong. If your running a level 10 set up, check your bolt bumper for wear, if the inner ring has begun to shred, pieces of it may be getting stuck in between the powertube and the bolt. The other problem may be a cracked powertube, if this is the case, you probably wont even be able to see the crack, but you will have to send the valve in to the factory to get it replaced(remember to call and get an RA number).
Marker Wont Cycle at All or Wont Cycle Reliably –
First things first, whether you are running a level 7 or 10 set-up, check those sections first. Next step is to make sure you have a full tank , your velocity is turned up enough, and the marker is oiled. If it seems you cant get your velocity high enough, your reg spring pack may be shot or binding(try turning it up all the way and then turning it back out). Make sure your rail bushing is installed. If the trigger rod is pressurizing, check the rod for the proper 1/16″ gap behind the trigger when the trigger is forward(and/or check for proper trigger(2.125″)/plunger(3.008″) rod length). A simple mistake is a field strip screw that is too tight or too loose (especially if the valve is too reactive), just past hand tight is fine.
As far as the rest of the back side of the valve, your reg valve pin’s spring pack may be shot, or there may be debris inside the valve. To cover the on/off area, check to see that your on/off pin is not bent or has any burrs. Make sure the quad o’ring is installed and ok. The inner assembly o’ring may have collected dirt, check it by unscrewing the the assembly apart. If you recently installed a new valve, on/off, or on/off pin, your pin may be too long or short(should be .712″).
To check the front side of the valve, look for debris between the powertube and bolt. As far as the rest of the marker, if you have installed grips or replaced lost grip screws, check that the grip screws are not touching the trigger rod when it moves. Make sure the sear axle pin is not overly tightened. I’ve personally seen markers that are so dirty between parts that they are out of tolerance, another point is that if you just had any of your marker parts painted, powdercoated, or bead blasted, you now know that it could also effect tolerance(if possible, remove the paint/powdercoating in between the frame/rail and between the rail/body. Aside from all this, you might have a bent rail or body(all it takes is a few thousands), send it to me or the factory to figure out.
Marker Chops or Breaks Too Much Paint –
If you are running a level 10 set up, see that section first. Another important section to look at is Nubbins and Ball Detents. Besides that, there are few things that would make you frequently chop or break paint. Make sure your not short stroking(mechanical mode). If your not running a level 10 set-up, you might need a faster loader or to change the batteries out in your current loader. Finally, make sure your paint fits your barrel. If none of this does the job, you need to dish out a few more bucks on some quality paint, or try and buy fresher paint.
Marker is Erratic Over the Chronograph –
Good Normal readings are anywhere plus or minus 10fps over the chrono. If your getting a difference of over 100fps, check your detent(see Nubbins and Detents). If you think it might be the valve, first dry fire to make sure it’s cycling properly. Check the valve for debris. Make sure it’s oiled. If nothing helps replace your reg. seat. Something you have to realize when chorno’ing is that most velocity fluctuations are caused by a bad paint to barrel match or poor quality paint(expensive paint is expensive for a reason). When I personally use good fresh paint, I will get a +/-0 reading over the chronograph, as soon as I go cheap, I will see a difference of up to 15fps.
Electrical Aspects
If you have gotten the marker to work in mechanical mode and that has still not solved the markers problems, then read on.
1. Is the battery fully charged?
Get a volt meter, it should read 20-22volts. If it’s not, make suer you charge it properly(see Charging the Battery). You may have to replace your battery or you may have a bad charger.
2. Does the board boot up?
Turn off, then on the marker. Make sure the firmware version lights up and that you can scroll through the menu. If it doesn’t, your trigger may be over adjusted (see section adjusting the trigger). If your sure the trigger is adjusted properly, check that your board is getting power. Check the positive lead for the nylon bushings, make sure everything is tight and that the wires are not being pinched. Follow the lead to the board, make sure everything is connected properly and that all connections are plugged in properly. Check that the negative terminal is securely in the grip frame. The board may not be grounding, disconnect the battery, unscrew the PC board and make sure there is no anodizing in the threads to keep the screw from making a good contact. If there is, use a dental pick to scratch it off and then replace the PC board. If none of this works, you may have a bad or fried PC board. Look over the board to see if there is a spot that the magic smoke escaped from.
3. The board boots up, but the marker still doesn’t fire.
If you have an Xmag, and your trying to dry fire, make sure your ace is off. Otherwise Listen for the solenoid when you pull the trigger. Make sure your not in trigger test mode and the solenoid is toggled on(provided your firmware has those features)(Holding menu button and pushing bottom button toggles solenoid). Make sure your trigger rod(2.125″), plunger rod(3.008″) and on/off pin(.712″) are proper length(You must also have the Quad o’ring installed in the on/off). The solenoid must have a little play, dont over tighten the mounting screw on the right side of the grip. If you have a multi meter, measure the solenoid for 2.6-2.8 ohms. If none of this does the job, you may have a bad solenoid or your plunger rod may be bent(it just takes a little bit), or your H.E.S. may need replacing(see adjusting the trigger).
Misc –
1. A stuck barrel (twist-lock) –
If it’s usually hard to get out, try loosening the allen screw under the twist-lock assembly, that will put less tension on the locking pin. The locking pin may be bent(get a new one) or the barrel may have developed a burr that needs to be removed.
 Twist-Lock Assembly Twist-Lock Assembly
2. Removing the trigger from the frame –
If you would like to remove the trigger from the frame to replace it with another, you will need a drift pin. Hit the trigger pin from the right side of the frame. When reinstalling a trigger, hit the pin from the left side.
3. Safety gets stuck –
Some are pickier than others, you may especially run into problems if you own a pre 1000SN Emag. Things I do that work ok is to remove and burrs in the safety that may catch, and/or slightly clip the spring that pushes up on the ball.
____________________________________________________________________________
12. Aftermarket Parts
All there basically is(off the top of my head) for the Emag and/or Xmag as far as aftermarket parts that AGD does not make is Blade triggers(the dont make them for the E/Xmag but do for mechanical frames) and custom grips. There are a few different people who make their own versions of the blade trigger and the custom grips, to find out more info gotowww.automags.org/forums and ask.
Barrels –
Like with any other marker a good barrel can go a long way, dont think it’s the first upgrade you need though, the stock mag barrel is great.
Bodies –
To my knowledge there is only AGD bodies made for the Emag. If your looking for a custom body, AGD sales the Slug body which many people and companies have turned into some nice looking stuff. Look into it since it has the same inner dimensions as the AGD mag bodies, it will not cause tolerance issues.
Bolts –
None of them do squat but the level 10 – If you dont have one, Get one.
Drops, and Regulators –
It’s all personal preference but dont add any more Regs to your mag set-up.
Misc –
If you have a ULE body, that feedneck is Angel threaded, there are a bunch of different kinds out there so go ahead and get one if your unhappy with the stock one. I’d advise to only use AGD detents though.
**To my knowledge there are 2 different versions of morlock boards available for the E/Xmag but I do not recommend them.
____________________________________________________________________________
13. Upgrades
The Obvious –
The best upgrades you can get for any set-up is a good air system and a good barrel kit. If your in the market for an adjustable air tank, I personally recommend the AGD Flatline system. If your looking for a screw-in tank, I recommend a Crossfire tank. As far as barrel kits go, I love the Custom Products CP Pro Kit.
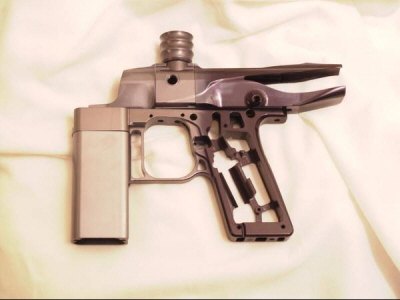
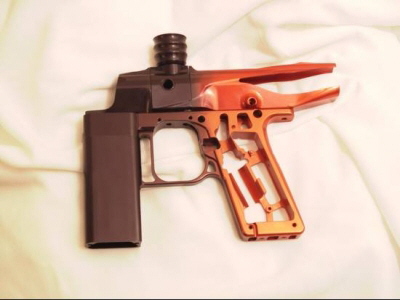
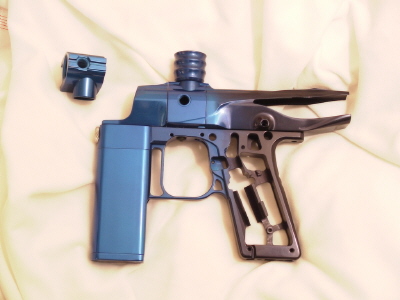
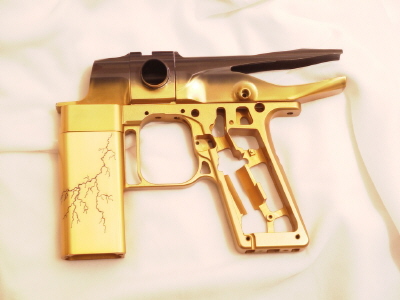
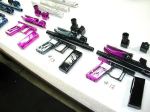
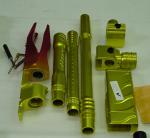
Bodies (Emag) –
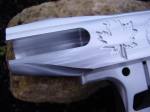
The ULE(Ultra Light Engineering) bodies are top of the line(54% lighter that the stainless bodies), available in 8 colors both in vertfeed and warpfeed. They are accept cocker threaded barrels, AGD/WDP threaded detents, and AGD/WDP threaded feednecks. Yes, they come with a detent and feedneck.
Valves and Bolts –
Newer Emags and all Xmags have Xvalves(w/ level 10 installed). If you have an Emag that doesnt have an Xvalve or level 10, I recommend looking into it.
ULE Parts (Emag) –
To completely convert your Emag into a ULE Emag you will need to get your hands on a ULE body, Xvalve, ULE Rail, CnC battery pack, and ULE Trigger frame. All these parts(except the ULE Trigger frame) are available through your local dealer or through Airgun’s online store. To get your Trigger frame turned into a ULE frame, goto www.automags.org/forums and ask who can get it done. |


 ) on his gun.


